Having worked at a nail salon as a licensed nail tech, I’ve met and worked with many nail techs who jealously guard their secrets behind what makes (and keeps!) an amazing manicure for weeks at a time. Even though no manicure can last forever (and who would want it to with thousands of trendy colors and techniques out there – check out my favorite ones), many of these secrets are actually special methods aimed at preventing the nail polish from peeling/chipping prematurely, keeping a long-lasting manicure.
However, as a nail tech who’s always had many returning clients who boasted about their long-lasting manicures, I’ve decided to share with you some tips and hacks to make the best out of your at-home nailcare-sesh and treat yourself to a beautiful, long-lasting manicure every time.
Here are 7 tips on how to keep your nail polish from chipping and give you that long-lasting manicure at home. Let me give you a guiding hand! (no pun intended)
1. Make Sure to Wash Your Hands First

Before taking any steps towards your dream manicure, go ahead and wash your hands first. The reason for this is because your nails are covered in natural oils (just like your hair and skin!) that can work against your nail polish by preventing it to stick to the surface of your nails. I like to wash my hands with regular soap and water first, and then dip a cotton ball in some nail polish remover to run along my nails – just to be sure I’ve removed all the oils.
2. File Your Nails – But Do it the Right Way!

Honestly, when I see someone file their nails in a see-saw motion, I cringe – because I’ve seen the damage this can cause to your nails. Using your nail file this way roughs up and thins out the surface of the ends of your nails, making them more likely to break and chip your nail polish. Always use your file in one direction, starting out at one corner of your nail and gently dragging it along towards the opposite one. Remember to not go overboard with filing, as this can weaken your nails as well! Feel free to check out my top selection of nail files if you’re in doubt on choosing the right ones.
3. Don’t Forget to Use a Buffing Block!
 Many women aren’t aware of the importance of buffing their nails. Having worked with all types of nails for a long time, I’m confident to say that what brushing is to your teeth – buffing is to your nails. Buffing is additional help in removing the natural oils on your nails, with an extra perk of revitalizing and smoothing out your nails, making for a more youthful and refreshed appearance.
Make sure you always use a soft buffing block that isn’t too abrasive! I personally love using this one by Onsen and have used it both in my salon and for personal use:
Using this buffing block makes my nails appear as if I’ve swiped on a layer of clear shiny base coat!
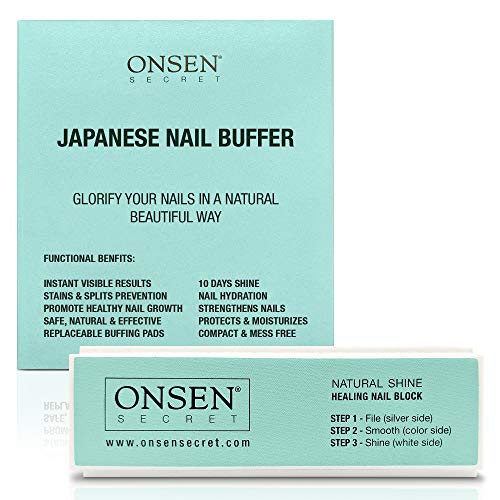
Nail Buffer Block, 3 Way Buffing - File, Smooth, Shine - Mini Natural Nail Polisher with 3 Sides - Coarse,...
- SHINY NAIL GROWTH – Healthy hands start in the nail bed. By cleaning, buffing, and improving blood circulation, a well-treated nail bed will lead to healthy, shiny nail growth. Make our nail polisher buffer a staple for your daily nail care.
Speaking of the base coat…
4. Never Forget to Use a Base Coat!
Some of you may be reading this, thinking: “Well yeah, duh!”, but I think we’re all guilty of cutting corners in our busy lifestyles and just smacking on a layer of nail polish without a base coat – because who’s going to wait for THAT to dry on top of everything else on those hectic mornings! But seriously, this is very important if you want healthy-looking nails, because the dyes in nail polishes can stain your nails. The base coat also prevents your nail polish from chipping and peeling too soon because it fills in ridges and makes the nail sturdier. Take a peek at my all-time favorite base coat!
5. Stop Shaking the Nail Polish Bottle!
We all know there are “mixing balls” in almost every nail polish bottle – but contrary to popular belief, it’s quite counter-productive to shake them. While they do activate the nail polish formula, shaking them in the bottle creates air bubbles which then transfer onto your nails. Any ridges or protuberances in nail polish application are just a chipping catastrophe waiting to happen. Instead of doing this, you can gently roll the bottle in your hands – do this for a minute or two, and you’ll also transfer the natural body heat from your hands onto the formula, making it easier to adhere to your nails!
6. Avoid Thick Layers of Nail Polish

Thick layers prevent the nail polish from drying and sticking to the nail properly because the top layer of the polish dries and hardens, leaving the inside still wet and mushy. It’s always better to go in with two thin layers, even three if the formula isn’t very opaque. Also, you can always touch up any streakiness or mistakes with the second layer!
7. Cap Off the Top of Your Nail!
Girls, listen up – this is likely the most important method to create a long-lasting manicure and prevent chipping. Each time you paint your nails, seal off the tip of your nail by dragging a thin layer of nail polish across the end of your nail. Make sure that each layer is completely dry, especially this last part, in order to prevent messing up your manicure!
There you have it – now you know how to keep your nail polish from chipping and peeling, so go ahead and treat yourself to a gorgeous, long-lasting manicure!